Tuesday, 24 March 2015

Wearable Artworks

I love the idea of getting my artwork out to people who wouldn't normally buy or be able to afford to buy original artwork. When I came to work on a new Steampunk costume I decided that I wanted to make some fabric wrist cuffs to wear which featured some of my wearable artwork so I thought I'd have a go at printing some myself!

I couldn't resist carving an octopus tentacle for a linocutprint. Its a very simple image but looks great printed onto fabric. I used the softcut lino so that I could cut out the shape of the tentacle and therefore didn't have to carve out the unwanted background. Heres me getting messy inking up the lino printing plate or tentacle!


 Lots of tentacles printed onto scraps of fabric, once I get printing I can't stop!
Once the ink was dry dry I started making! This is the one I made for myself with a ruffle at the wrist which matches my new green elf leaf skirt!


 Once I got started making of course I had to make a few more!

Purple Octopus Tentacle Cuff

 And a few more! These are available in my Folksy shop.
Steampunk Tentacle Fabric Cuffs
  I've even managed to make use of my huge tin of buttons too!
 With a little bit of left over printing ink I even printed a tentacle tote bag too!
Tentacle Tote Bag

I was enjoying making them so much I thought I'd try a few different coloured printing inks and also some of my cog linoprinting plates!

Steampunk Cogs Fabric Cuff


Green Steampunk Cog Fabric Cuff

I'm having great fun making them so should be making some more very soon!

Clare xx

Sunday, 1 March 2015

Purple Animal Prints

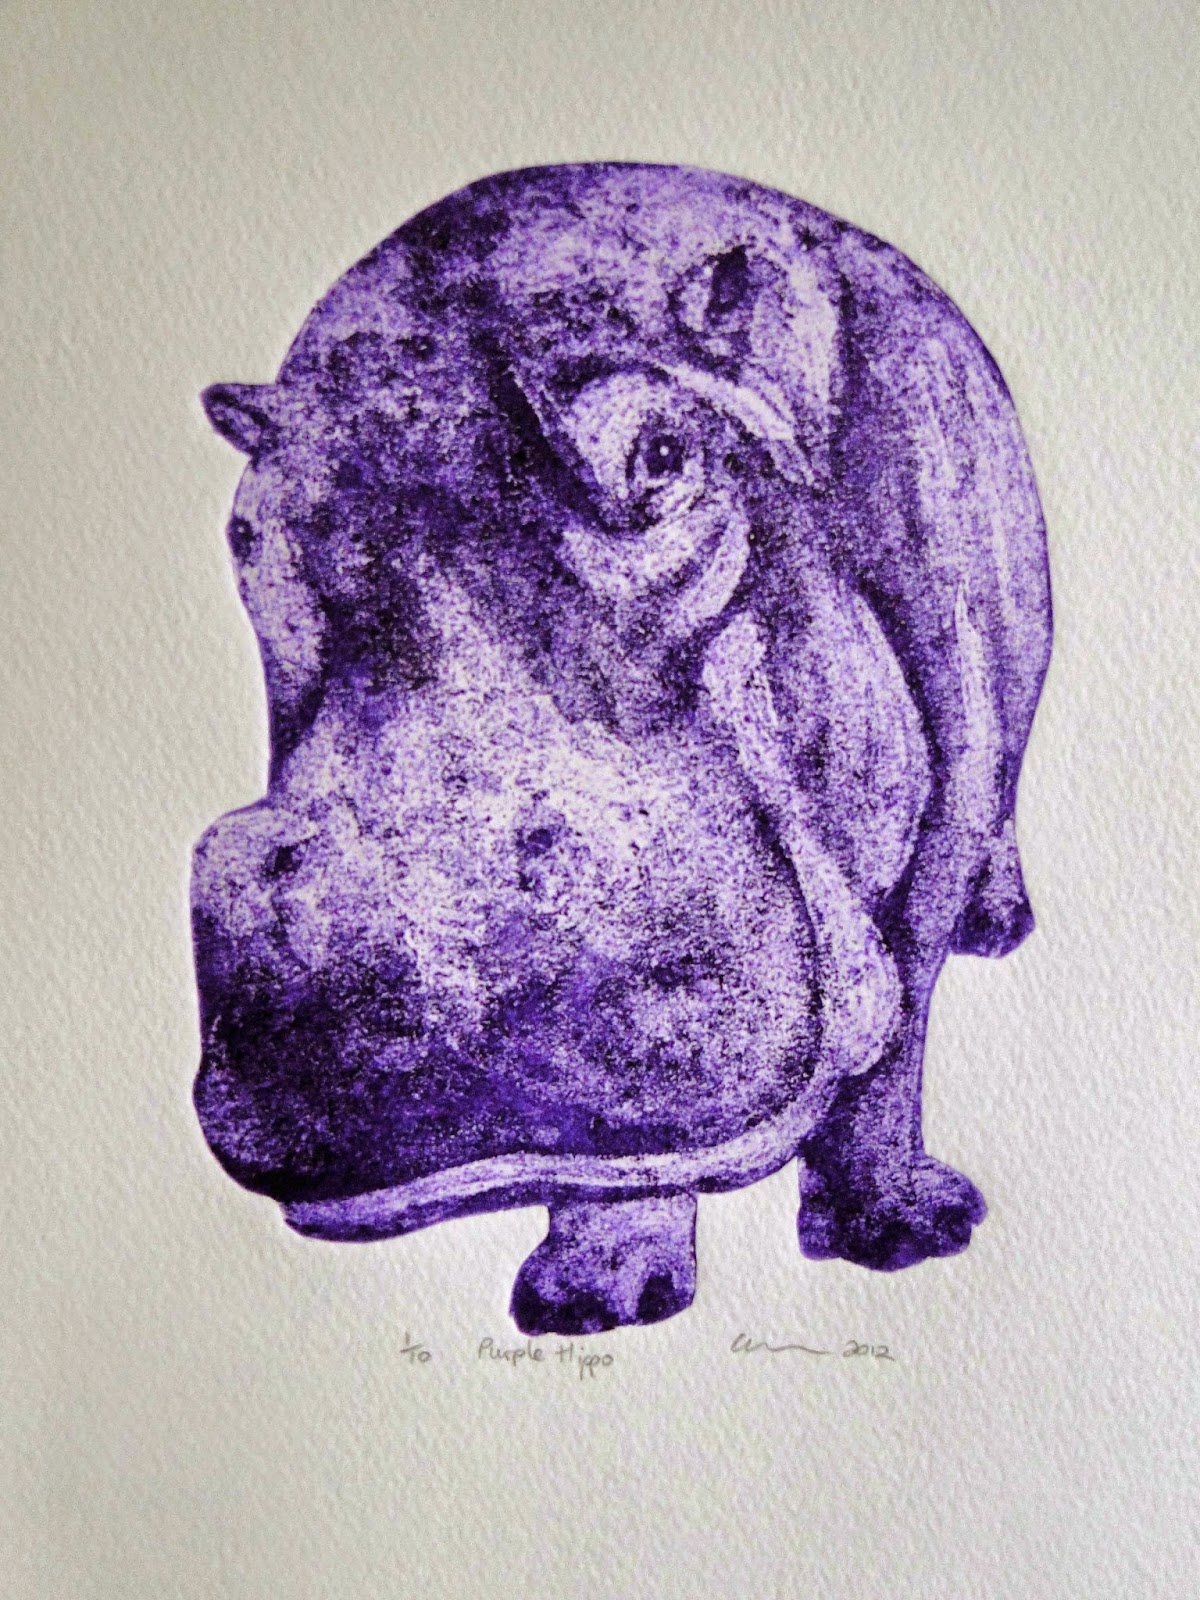
I love the colour purple and find myself using it a lot in most of my artwork! When I first started doing my animal collagraph prints I just couldn't resist trying them in purple ink and can't believe how good they look!

Collagraph Print - created from a card plate made by adding glue, paint, enamel, collaged elements etc. This creates textures which hold the ink in varying degrees and is then printed through the intaglio process. This is a great technique for my animal prints as I can cut the card into the animal shapes!

The very first was my hippo collagraph print he just had to be tried in purple and was so popular the edition sold out completely with most of them going to America!

Purple Hippo Collagraph Print
I also did a Purple Elephant, Purple Rhino, Purple Penguin, Purple Tiger and Purple Cat and had to restock my purple printing ink quite a few times!

Recently I have been doing some more animal collagraph prints and couldn't resist doing a few purple ones!

Here's me getting very messy printing a Purple Meerkat.

 
And a Purple Pony hot off the printing press!
 
 
 A few of my toys got to star in the photos too!
Purple Lemur Collagraph Print
 
Purple Meerkat Collagraph Print
 
Purple Pony Collagraph Print
Looking forward to working on a few more purple animals soon!

Clare xx


Friday, 13 February 2015

New Photos!


"Hormakhet" Collagraph Print

I've been doing a bit of experimenting with updating some of my artwork selling photos. Normally I take the photos outside with lots of good natural light so I get the best colour matches to the artwork but this does have its downsides! Such as trying to find a neutral background in the garden that isn't going to detract from the artwork and look too busy, I normally prop them on our brick barbecue as that has a neutral wall behind it. The weather can be fun too, you can almost have the perfect shot and then the wind blows your artwork over! Also I have the added problem of a very nosey cat who likes to come and see everything that I am doing! 


Morpheus the cat supervising a photoshoot!
I decided last week to try something a bit different and to make the most of the bright Winter sun and try a few photos inside. I choose to take them on our marble fireplace as its cream with a neutral wall behind and the window is to the side to give lots of natural light.

I thought I'd start with some of my Egypt collagraph prints and whenever we go anywhere on holiday we always bring back little models/figures so I've got lots of props to go into the photos! I thought the Egypt prints looked great with the tiny little pyramids and Sphinx figure that we got from when we visited the pyramids a few years ago.

"Sphinx Head" Collagraph Print
I tried photographing my Stonehenge collagraph prints with a little model of Stonehenge itself but the model was very hard to make out and made the photo look a little fussy. I then remembered all my pebbles that I have collected from various beaches which I thought they would go really well with Stonehenge (it did cross my mind to make a mini Stonehenge with the pebbles but I thought that might be going a bit too far!)

"Stonehenge" Collagraph Print
I then got thinking about some of my Steampunk inspired artworks and thought why not just take a photo of the artwork with the actual hat and goggles that are in the artwork itself! This is my partners top hat and goggles which look great on him, the top hat is sadly too big for me else I would borrow it occasionally!

"Steampunk Penguin" Collagraph Print
Heres a watercolour painting of Morpheus the cat in my purple bowler hat and goggles and the very hat and goggles in the photo!

"Happy Cat" Watercolour Painting
I'm really pleased with how these have come out, now to get creative on all my other artwork photographs!

Clare xx

Thursday, 29 January 2015

Printing Collagraph Ponies!


After Christmas we decided to go for a wintery walk to work off all that food and in our local nature reserve there is a herd of Exmoor ponies running wild. Sometimes you can spot them but as it is such a big place you can very often miss them. This time we were so lucky to just walk into them grazing and I managed to get quite a few photos which of course I had to use in my artwork!

I decided to work on a new pony collagraph print: Collagraph Print - created from a card plate made by adding glue, paint, enamel, collaged elements etc. This creates textures which hold the ink in varying degrees and is then printed through the intaglio process. 

This is the very start of  the process a piece of spare mount board which I have drawn the rough image onto and am starting to work into with paint.

 A few days later and the printing plate is ready to print! I love working with card as it is so easy to cut out and shape especially for my animal prints.


Heres where it starts to get messy! This is my dining room table with all my inks and my etching printing press layed out. I decided to use a sepia coloured etching ink and I am starting ro rub the ink into the printing plate to cover every part of it.
I then have to take the ink back off the printing plate usually with newspaper and tissue paper. You can see I do get very inky!
The inked up printing plate ready to be printed. The ink has been retained in the rougher areas of the printing plate and where you can see white the plate is a lot smoother so won't hold the ink.
On my etching press ready for some dampened paper to go on top and then the blanket and then the whole lot put through the press. The weight of the roller will force the ink into the paper, leaving it slightly embossed.
Hot off the press-the moment when all is revieled!
The printing plate on the right and the finished print comparison. Note the print is reversed so you always have to remember to work backwards!
A few pony prints drying on my spare room bed!
Heres the finished pony collagraph print. I should be printing it in a few different colours soon too!
Sepia Pony Collagraph Print
Clare xx

Wednesday, 21 January 2015

Cat in a Hat Painting


How to turn a photo of my cat Morpheus into a finished painting! 

Its been a while since I've done a cat in hat acrylic painting so heres a little step by step behind the scenes on how I create my paintings.

After a bit of photo manipulating in Photoshop I was ready to start! I hate working on a white canvas so always paint over the white first, for my cats in hats paintings red is usually my favourite colour to use for the background as it is a good contrast for the black cat. You can just see a very rough sketch on the canvas.

 The first layer of paint. I usually start with the white and then work my way over the rest of the painting blocking in all the basic colours and covering the canvas.

A few more layers and some details are starting to emerge,

A bit more white added to the fur and to give it a bit of texture. I never worry about brush marks as I like to see them in the finished painting. Also a bit more detail in the goggles and top hat. The top hat is painted prussian blue to stand out from the black of the cat and also as I love using prussian blue!

Again more details.

Almost finished. A few highlights picked out and of course the whiskers!

My very gunky takeaway paint tray palette which keeps my paint wet and my lovely new paintbrushes which I got for Christmas!


Topper Kitty
The finished acrylic painting!

A Few Other Cats in Hats Paintings!

Clare xx


Friday, 9 January 2015

My Studio Space!

 
I've decided to try and write a few more Blogs this year so this will be the first of many (hopefully!)

I thought I would introduce you all to my "studio" space or spare bedroom/dining room table! This is where all the magic happens!

This is or was my dining room table! My etching press lives on here most of the time and I always have the company of a Dalek or two while I am printing! Normally the cat tries to help too so he often has inky feet!

This my desk in the spare room. Its actually an ingenious design from Ikea and when all the drawers are away it just looks like a normal piece of bedroom furniture but when the big fake top drawer is opened it makes a desk, perfect for painting cats on!

One of my recent oil paintings just waiting for him to dry.

Lots and lots of pencils and paintbrushes ready for action. Totoro and Morph often help out too! The boxes in the background are where all my greeting cards live ready to be posted out.

 A few of my cat (and a sneaky parrot) paintings waiting for new homes. The easiest place to store them is on the walls so they don't get damaged and friends that come and stay always say that sleeping in the spare room is like sleeping in an art gallery!

Clare xx